DIY Rain Barrel System: Collect Water and Cut Your Bills
Table of Contents
Introduction: Why Your Next DIY Project Should Start with Pickets and Puddles
Let’s be honest—outdoor projects can drain your wallet faster than a thunderstorm fills a gutter. Between premium lumber prices and rising water bills, creating the backyard oasis of your dreams often feels financially out of reach. But here’s the good news: you don’t have to sacrifice quality or style to stay within budget.
The secret? Two game-changing budget hacks that transform how you approach outdoor DIY projects. First, swap expensive lumber for versatile fence pickets that deliver the same durability at a fraction of the cost. Second, embrace rainwater harvesting with a DIY rain barrel system that slashes your water bills while supporting environmental sustainability.
Consider this eye-opening cost comparison: fence pickets typically cost around $2 each, while a standard 2 in. x 6 in. x 12 ft. #2 Prime Ground Contact Pressure-Treated Lumber board runs approximately $12. That’s six times the expense for similar outdoor functionality. When you multiply those savings across an entire project, the difference becomes substantial.
This comprehensive guide walks you through both strategies, providing detailed instructions for building impressive outdoor structures with fence pickets and creating an effective rain barrel diy system that conserves water and reduces utility expenses. Whether you’re a seasoned DIYer or just getting started, these techniques deliver professional results without the professional price tag. Make your DIY projects easier and more fun.
Fence Pickets: The Budget-Friendly Lumber Alternative
Why Fence Pickets Win the Budget Battle
Fence pickets represent one of the most underutilized materials in the DIY world, yet they offer remarkable value for outdoor projects enthusiasts. At approximately $2 per picket, they provide massive cost savings compared to traditional lumber options, making ambitious projects suddenly affordable.
What makes fence pickets particularly valuable is their pressure-treated construction. These boards are specifically engineered to withstand outdoor conditions, resisting moisture, rot, and insect damage far better than standard indoor lumber. When you’re building garden structures, planters, or decorative elements that will face rain, snow, and sun exposure, this built-in durability becomes essential.
The versatility of fence pickets extends beyond cost and weather resistance. These boards accept paint, stain, or sealant beautifully, allowing you to customize the finished appearance to match your aesthetic vision. Alternatively, leaving them raw creates an authentic rustic charm that weathers gracefully over time. Available in 6, 8, and 10-foot lengths, pickets accommodate various project scales from small accent pieces to larger structures.
Top 5 Outdoor DIY Projects Using Fence Pickets
Ready to put fence pickets to work? Here are the most popular and effective applications:
Garden Beds and Raised Beds: Fence pickets excel for constructing raised garden beds due to their natural rot resistance and affordability. Build a substantial raised bed for a fraction of what composite or cedar lumber would cost, knowing the pressure-treated wood will withstand constant soil moisture for years.
Exterior Siding: Transform a plain shed, outdoor kitchen, or garden structure with picket siding. The uniform width creates clean lines, and the vertical installation adds visual height. This application works particularly well for covering existing structures that need a facelift or as primary siding for new builds.
Outdoor Furniture and Decorative Accents: Craft rustic-style trellises, privacy screens, or decorative garden accents that add character to your landscape. Pickets work beautifully for creating patio furniture, plant stands, or custom shelving for potting benches.
Decking and Post Wraps: While pickets won’t replace structural deck framing, they serve as excellent decking material for lightweight platforms or walkways. They’re also perfect for wrapping existing posts to upgrade their appearance without the expense of replacing them.
Small Structures: Build a practical outdoor storage shed, tool organizer, or compost bin using pickets as your primary building material. The cost savings on a project this size can easily reach hundreds of dollars compared to using premium lumber.
Building Your High-Value, Low-Cost Rain Barrel System
Pre-Project Essentials: Legality, Location, and Pressure
Before you construct your DIY rain barrel system, address three critical considerations that determine success. First and foremost, research your local regulations regarding rainwater harvesting. While most areas permit residential rain collection, some states maintain restrictions or require specific system designs. A quick call to your city’s planning department or water authority prevents potential legal complications down the road. Check out our latest tutorial on Creative Pallet Projects for Home and Garden Décor.
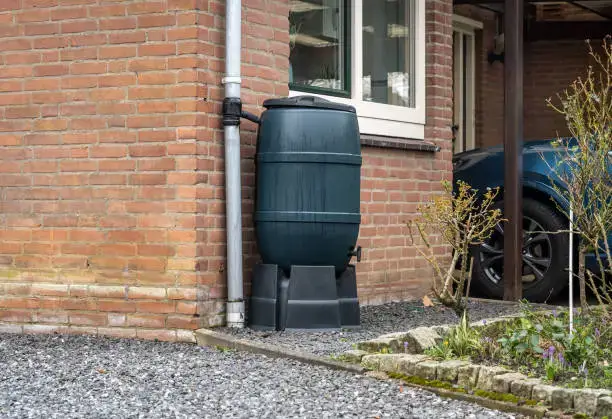
Location matters significantly for rain barrel functionality. Your barrel must be elevated 12 to 36 inches off the ground on a sturdy, level platform such as concrete blocks, pavers, or a wooden stand. This elevation serves two purposes: it creates gravity-fed water pressure for filling watering cans or attaching hoses, and it positions the spigot at a convenient working height. Here’s a useful calculation: for every foot you raise the water off the ground, you add approximately 0.433 psi of pressure.
Safety and maintenance considerations round out your pre-project planning. Water collected in rain barrels should never be consumed by people or pets, as it may contain contaminants from roofing materials, bird droppings, or airborne pollutants. Regular maintenance includes checking screens for debris accumulation and ensuring the barrel remains covered to prevent mosquito breeding and algae growth. A well-maintained water conservation garden system provides years of reliable service with minimal upkeep.
DIY Rain Barrel Options: Trash Can vs. Wine Barrel
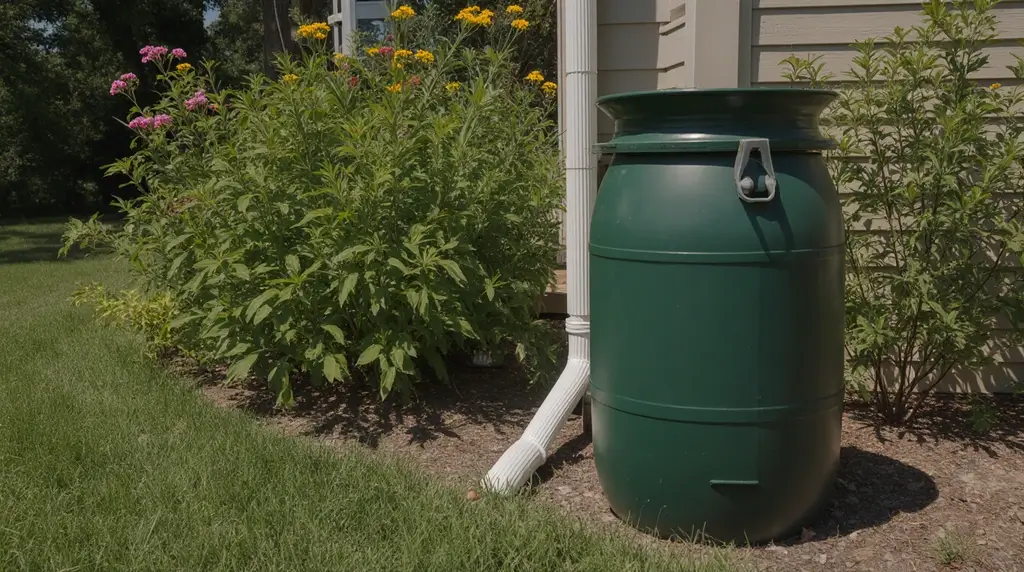
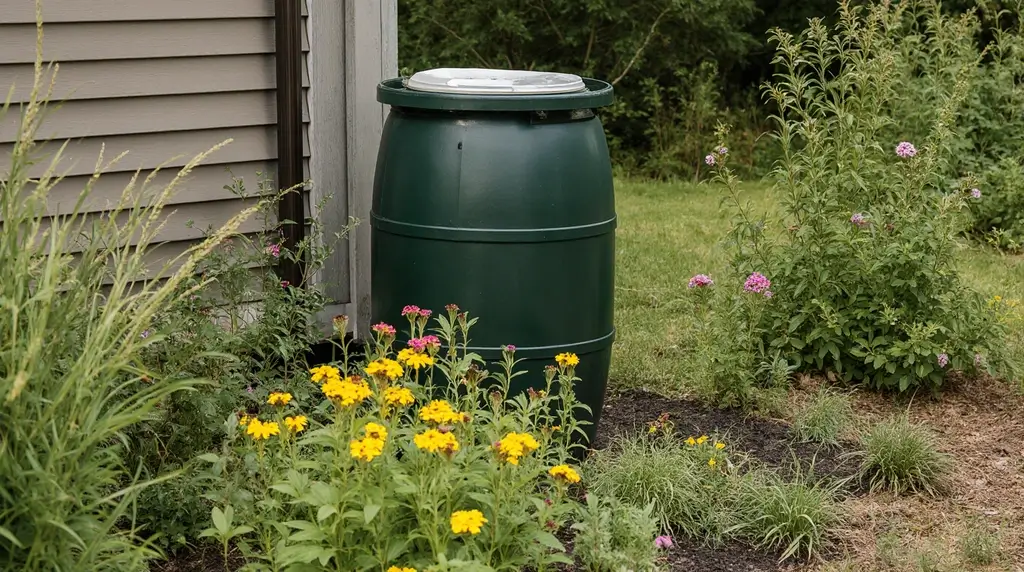
Option A: The Ultra-Budget Trash Can Rain Barrel
For maximum affordability, a standard outdoor garbage can transforms into a highly functional rain barrel diy project. This approach typically costs around $54 for materials compared to $100 or more for commercial rain barrels.
Choose a sturdy plastic outdoor garbage can with a lid, preferably in the 44-gallon size for optimal durability and UV inhibition. Many trash cans carry NSF/ANSI 2 certification, indicating food-grade plastic quality. The heavy-duty construction withstands being frozen solid without splitting—a crucial feature for regions with harsh winters.
Essential materials include a brass spigot, waterproof sealant, and mesh screen or landscaping fabric. Begin by drilling a hole near the bottom of the can for the spigot, positioning it high enough to place a watering can underneath but low enough to maximize water access. Secure the spigot with washers on both sides and apply generous sealant to prevent leaks.
Cut an entry hole in the lid sized to accommodate your downspout, either directly or with a diverter system. Cover the top opening with mesh screen or landscaping fabric secured with the lid or bungee cords to filter debris and prevent mosquitoes from accessing the water. This simple rainwater harvesting system provides immediate water savings with minimal investment.
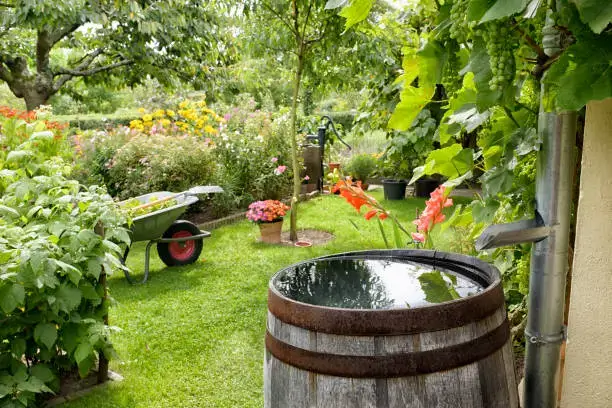
Option B: The Aesthetic Wine Barrel Rain Barrel
For homeowners prioritizing visual appeal alongside functionality, wine barrels offer an attractive alternative to plastic. These barrels feature solid construction, often incorporating corrosion-resistant galvanized steel hoops that outlast whiskey barrel hardware.
A typical wine barrel rain barrel project using an Earth Minded™ DIY Rain Barrel Kit runs approximately $140.95 in total costs, with the wine barrel itself representing the largest expense at around $106.18. While more expensive than the trash can method, the finished product delivers upscale aesthetics that complement landscaping investments.
Installation follows a similar process: prepare a level base using a stone paver, drill holes for the spigot and overflow drain, install the fill hose seal in the top opening, and prepare your downspout using the included diverter kit. The diverter allows you to redirect water flow back to normal drainage when the barrel fills, preventing overflow around your foundation.
Expanding Capacity: Multi-Barrel Systems
A single rain barrel, even at 30 to 40 gallons, empties surprisingly quickly during active gardening. Consider that a typical garden hose delivers approximately 17 gallons per minute—your barrel could drain in just over two minutes of continuous use. For serious garden watering, a multi-barrel system becomes essential.
Connecting multiple barrels multiplies your water storage capacity without sacrificing convenience. Many DIYers link five 55-gallon drums together, creating a 275-gallon rainwater harvesting system that handles substantial irrigation needs.
Two connectivity approaches exist, each with distinct advantages. Connecting barrels with short hoses at the bottom allows them to fill and drain at equal rates, functioning as one giant reservoir. This configuration lets you empty all barrels simultaneously from a single spigot, maximizing convenience.
Alternatively, connecting barrels at the top allows overflow from the first barrel to cascade into subsequent containers. While this method is simpler to install, it requires moving your hose from barrel to barrel to access water from each unit individually. Choose based on your priorities: convenience favors bottom connections, while simplicity suggests top-mounted overflow systems.
Essential DIY Planning & Sustainability Tips

Maximizing Durability for Outdoor Projects
The difference between a project that lasts one season and one that endures for years often comes down to using appropriate materials. Outdoor construction demands specific considerations that interior projects don’t face.
Always select exterior-grade screws manufactured from stainless steel or bronze. Standard interior screws corrode rapidly when exposed to moisture, weakening joints and creating unsightly rust stains. The modest additional cost of quality fasteners pays dividends in structural integrity and appearance.
Adhesives and sealants require equal attention to outdoor suitability. Use outdoor-specific wood glue such as Titebond III, which provides waterproof bonds that won’t fail during wet weather. Similarly, ensure any wood filler carries an exterior-grade rating, as indoor formulations deteriorate when exposed to moisture and temperature fluctuations.
For wood projects like planter boxes or raised beds, apply waterproofing products such as Thompson’s WaterSeal. This protective barrier significantly extends wood life by preventing water absorption that leads to rot, warping, and structural failure. Reapplication every few years maintains protection as the original coating weathers.
Rainwater Benefits for Your Garden
Beyond cost savings, rainwater offers distinct advantages for plant health compared to municipal water supplies. Understanding these benefits helps you appreciate the full value of your water conservation garden system.
Rainwater is naturally soft and chemical-free, lacking the chlorine and fluoride commonly added to tap water. Many plants, particularly acid-loving species and those with sensitive root systems, respond poorly to these chemicals. By eliminating chemical exposure, rainwater supports healthier root development and reduces stress on your plants.
Nature provides a bonus nutrient in collected rainwater. As rain falls through the atmosphere, it absorbs nitrogen, which reaches your garden in a form plants readily absorb. This natural fertilization helps plants grow more vigorously and display richer, more vibrant foliage without synthetic fertilizer applications.
The pH balance of rainwater tends toward neutral or slightly acidic, typically ranging from 5.5 to 6.5. Most garden plants prefer this range over the often alkaline pH of municipal water, which can interfere with nutrient uptake and cause leaf yellowing in acid-loving plants like azaleas, blueberries, and rhododendrons.
Winterization: Protecting Your Investment
In regions experiencing freezing temperatures, proper winterization prevents costly damage to your rain barrel system. Water expands approximately 9% when it freezes, generating tremendous pressure that can crack even durable containers.
Begin winterization before the first hard freeze by removing the downspout diverter and restoring normal downspout flow. Completely drain the barrel, ensuring water exits away from your home’s foundation to prevent ice formation that could damage basement walls or create slip hazards.
If your diverter kit includes a winter hole cover, install it over the downspout opening to maintain weather protection during the off-season. Store removable components like spigots and hoses in a garage or shed where they won’t be exposed to freeze-thaw cycles that degrade seals and connections.
Come spring, inspect all seals and connections before returning the system to service. This quick check catches any winter damage before you refill the barrel, allowing repairs while the system is empty and easier to work with.
Conclusion: Sustainable Savings and Stylish Spaces
The combination of fence pickets and rainwater harvesting represents more than just budget-conscious DIY—it’s a philosophy of working smarter, not more expensively. By choosing materials specifically designed for outdoor durability and capturing free water falling from the sky, you create beautiful, functional spaces while keeping more money in your pocket and reducing your environmental footprint. Check out our latest tutorial on How to Build a Fire Pit for Cozy Evenings Outdoors.
Whether you’re building raised garden beds from $2 pickets or collecting hundreds of gallons of rainwater in a multi-barrel system, these strategies prove that impressive outdoor projects don’t require impressive budgets. The satisfaction of creating something beautiful and practical with your own hands, while knowing you’ve made financially and environmentally responsible choices, adds value that no store-bought solution can match.
What outdoor project will you tackle first with these budget-friendly approaches? Have you checked your local regulations regarding rainwater harvesting yet? Share your plans and completed projects with fellow DIY enthusiasts using hashtags like #BudgetDIY, #OutdoorProjects, and #RainwaterHarvesting. Your creativity might inspire someone else to start their own sustainable savings journey.
Looking for more ways to upgrade your outdoor space on a budget? Explore our guides on building DIY Fire Pits that create cozy gathering spaces and crafting Pallet Furniture that transforms free materials into functional outdoor pieces. Your backyard transformation starts with a single project—make it count.
Is building a rain barrel system difficult for beginners?
Not really—most setups involve connecting a barrel to a gutter downspout and adding a simple screen or valve. Once you understand where the water flows, the rest is just basic assembly. It’s a great starter DIY project because you can finish it in an afternoon.