Basement Makeovers: Transform Storage Into Living Space
Table of Contents
Introduction: Unlocking Your Home’s Hidden Wing
Every home has untapped potential, and for most homeowners, that potential lies beneath their feet. Basement makeovers represent one of the most practical home improvement trends available today—transforming dark, cluttered storage areas into vibrant, functional living spaces that genuinely enhance your lifestyle.
A basement remodel is an opportunity to add significant living space, increasing both your day-to-day quality of life and your home’s value. Common uses include recreation rooms, smart home offices, guest bedrooms, in-law suites, and entertainment zones. Whether you’re dreaming of a cozy family hangout, a productive workspace, or an income-generating rental unit, your basement holds remarkable possibilities.
The investment promise is compelling: basement makeovers add finished square footage and utility—especially when you incorporate features like a kitchen or bathroom. But let’s address the elephant in the room: unfinished basements are often dark, damp, and cluttered. The concrete walls feel cold, the low ceilings feel oppressive, and those mysterious stains tell stories you’d rather not investigate.
This comprehensive guide will show you how to tackle these issues practically and affordably, exploring both basement makeovers on a budget and premium transformations. You’ll discover actionable strategies that turn your scary cellar into a space you’ll actually want to spend time in. Want to make your home feel more comfortable? You’ll love our tips on Best Laminate Flooring Options for Families.
The Financial Facts: Understanding Basement Remodel Costs and ROI
Before diving into hammers and paint swatches, let’s talk numbers. Understanding the financial landscape of basement renovations helps you make informed decisions and set realistic expectations for your project.
Calculating Your Budget
The financial investment for finishing a basement varies considerably based on location, existing conditions, and your finish level preferences. Here’s what you need to know:
Average Cost Range: The typical investment for finishing an unfinished basement falls between $8,800 and $34,500, with most homeowners spending around $18,400 for a mid-range finish.
Per Square Foot Estimate: Expect costs ranging from $65 to $135 per square foot. A 1,000-square-foot basement might cost anywhere from $65,000 to $135,000 for a high-end finish, though budget-conscious approaches can significantly reduce these figures.
Geographic Considerations: Location dramatically impacts costs. High-cost states like Massachusetts, New York, and California typically see remodeling expenses 20-40% above the national average due to labor rates, permitting requirements, and material costs.
For those exploring basement makeover ideas on a tighter budget, focusing on essential improvements—like moisture control and basic finishes—can bring your space to life for under $10,000 with strategic DIY efforts.
What Adds the Most Value?
Not all basement improvements deliver equal returns. Understanding which upgrades provide the best bang for your buck helps prioritize your spending:
Key Value Drivers: Adding finished square footage automatically increases your home’s appraised value. Creating an office, additional living space, or bedroom expands your home’s functionality and appeal to future buyers.
Highest ROI Upgrades: Adding a bathroom ranks among the most valuable improvements you can make. A three-quarter or full bath in the basement significantly enhances convenience and can recoup 60-70% of costs at resale. Creating a full basement apartment—complete with separate entrance, kitchen, and bath—can add tremendous value in markets where rental income or multi-generational living arrangements are desirable.
Market-Dependent Features: In some regions, a finished basement with egress windows (allowing legal bedrooms) or dedicated entertainment spaces with wet bars command premium prices. Research local market preferences before committing to specialty features.
The Most Expensive Components
Understanding where your money goes helps you budget effectively and identify potential savings:
Top 3 Expenses: The most expensive parts of finishing a basement are:
- Framing lumber – Creating walls, defining rooms, and building out the space structure
- Drywall installation – Material and professional installation costs add up quickly across large areas
- New flooring – Quality flooring materials and installation represent a significant investment
Additional high-cost items include electrical work (especially when adding outlets, lighting circuits, and dedicated lines for appliances), plumbing extensions for bathrooms or kitchenettes, and HVAC modifications to adequately heat and cool the space.
Solving the “Scary Basement” Problems: Essential Prep and Structuring
The biggest obstacle to beautiful basement makeovers isn’t design—it’s addressing the fundamental issues that make basements feel uninhabitable. Let’s tackle these challenges head-on.
Water and Dampness Mitigation (The Necessary First Step)
Moisture is the enemy of finished basements. Before investing in beautiful finishes, you must create a dry environment:
Addressing Damage: If your walls show superficial staining and peeling, investigate deeper. Are these cosmetic issues or symptoms of ongoing water intrusion? Check for structural cracks, water stains that appear after heavy rain, or musty odors indicating persistent moisture.
Exterior Prevention: The first line of defense happens outside. Ensure gutters and downspouts function properly, directing water at least 6-10 feet away from your foundation. Many basement water issues resolve simply by fixing exterior drainage.
Waterproofing Masonry: For cinderblock or masonry walls, apply Drylok moisture-sealing paint as an affordable interior solution. However, surface preparation is critical—the product won’t adhere to loose paint or efflorescence (white mineral deposits). Use Drylok Etch to clean and prep the masonry, scraping away any loose material first.
Application Technique: Here’s a crucial detail most DIYers miss: Drylok should be brushed on thick with a masonry brush to penetrate all the crevices of cinderblock or porous concrete. Rollers simply can’t force the product into these tiny gaps where water infiltrates. Plan on two coats, allowing proper drying time between applications.
Grading Solutions: Regrade the exterior ground around your foundation to slope away from the house—aim for a 6-inch drop over 10 feet. This simple landscaping adjustment prevents water from pooling against your foundation walls.
Managing Structural Elements and Obstructions
Every basement has structural realities you’ll need to work around—or incorporate creatively into your design:
Lally Columns and Jack Posts: Those adjustable steel columns (jack-posts) or lally columns support your home’s structure and cannot be removed. However, they don’t have to be eyesores. Box them in with drywall or wood, creating finished columns that blend with your design. Some homeowners use them as natural room dividers or incorporate them into built-in shelving units.
Low Ceilings and Exposed Pipes: One of the most common basement complaints is insufficient headroom. If you have old, non-functional pipes—like abandoned radiator heating lines—have them professionally removed after confirming they’re not in use. This simple step can reclaim 6-8 inches of precious headspace.
Safety Note: When removing old pipes, use soapy water to control dust, and wear a proper respirator if pipes may contain asbestos insulation. When in doubt, hire a professional for pipe removal.
Ceiling Height Illusion: If you’re stuck with a low ceiling (7 feet or less), create the illusion of height through color. Paint both walls and ceiling the exact same color—this eliminates the horizontal line that visually establishes the ceiling height, making the space feel more open and less cave-like.
Budget-Friendly Finishes and Design Hacks
You don’t need a Fortune 500 budget to achieve stunning results. These strategic choices deliver maximum impact while keeping costs manageable—perfect for basement makeovers on a budget. For long-term organization ideas, explore our collection of Home Office Designs Hacks for Small Spaces.
Flooring Solutions
The floor sets the foundation (literally) for your entire space. Choose wisely to balance cost, durability, and aesthetics:
Affordable Options: Vinyl plank flooring leads the pack for budget-conscious basement makeovers. Modern luxury vinyl plank (LVP) realistically mimics hardwood or tile, resists moisture beautifully, and costs $2-7 per square foot installed. It’s also DIY-friendly, with many click-lock options requiring no glue or nails.
Carpet Tiles: Modular carpet squares (like Flor tiles) offer versatility and practicality. They’re easy to install, replace if damaged or stained, and can be arranged in creative patterns. Prices start around $3-5 per square foot, and installation is genuinely beginner-friendly.
Painting Concrete: For the absolute lowest cost, paint your concrete floor directly using high-traffic exterior floor paint, such as Behr Premium High Traffic Floor and Patio paint. Add a fine sand additive to the final coat for slip resistance. This approach costs under $100 for a large basement and delivers a surprisingly clean, modern look.
Ceiling Solutions
Basement ceilings present unique challenges—exposed ductwork, pipes, wiring, and structural elements create visual chaos. Your approach here significantly impacts both budget and aesthetics:
Saving Money: Leaving the ceiling open but painted significantly reduces costs. Spray-paint everything—joists, ductwork, pipes—a uniform color (black, white, or dark gray are popular). This industrial aesthetic has become trendy in modern home improvement trends, and it’s far cheaper than installing a suspended ceiling.
Traditional Cover-Ups: Drop ceilings remain popular because they’re relatively inexpensive ($2-5 per square foot) and provide access to utilities above. However, they do lower your ceiling height by 3-4 inches.
Ultra-Budget Option: Glue-on ceiling tiles cost under $1.50 per square foot and apply directly to joists or existing surfaces, saving both headroom and installation costs. These lightweight tiles come in various patterns and can be painted.
Stylish Alternative: Shiplap ceiling planks create a cozy, cottage-style feel while concealing an ugly ceiling. Though more expensive than glue-on tiles, they’re still budget-friendly compared to drywall installation.
Defining and Designing Spaces
Strategic design choices transform raw square footage into purposeful, inviting areas:
Paint Power: Never underestimate fresh paint’s transformative power. Even cement walls benefit from quality masonry paint, which brightens the space and creates a finished appearance. Light colors (whites, soft grays, warm beiges) maximize light reflection in naturally dark basements.
Accent Walls: Create focal points and add architectural interest with accent walls. Install wood features (like board-and-batten or reclaimed wood planks), textured drywall treatments, or even repurpose flooring materials as wall covering. These features draw the eye and add warmth to otherwise sterile spaces.
Lighting Strategy: Lighting makes or breaks basement ambiance. Replace builder-grade fixtures with updated options—recessed lighting provides even illumination without eating ceiling height, while daylight-spectrum LED bulbs (5000-6500K) simulate natural light and combat the cave feeling.
Strategic Fixtures: Pendant lights over a bar area, desk, or dining table add style and define zones. These affordable fixtures (starting around $30-50) deliver disproportionate visual impact.
Zone Creation: Frame walls or install half-walls (pony walls) to separate areas without closing off the space entirely. This creates distinct zones for working, entertaining, and relaxing while maintaining an open, airy feel—crucial in basements where natural light is limited.
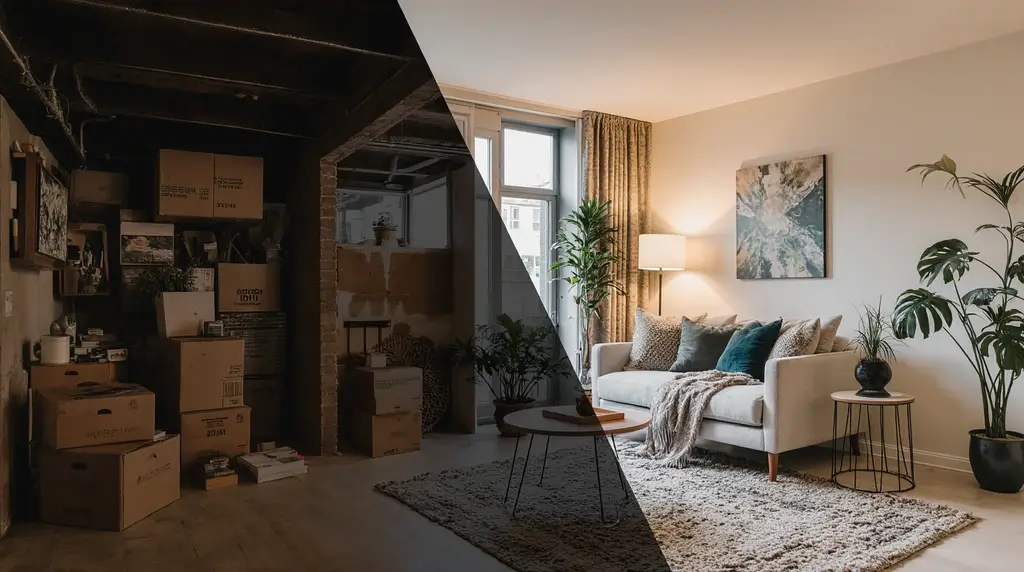
Inspiration Gallery: Real-Life Before and After Transformations
Nothing inspires like seeing actual transformations. These real-life basement makeover ideas demonstrate what’s possible regardless of your starting point:
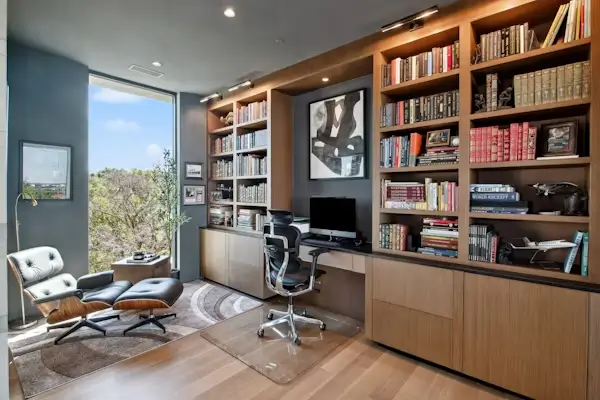
Home Office Transformation
Before: Blank slate needing complete finishing—bare walls, concrete floor, exposed ceiling After: Handsome, masculine workspace featuring a budget-friendly open ceiling approach (painted exposed elements), luxury vinyl plank flooring, and built-in desk area Key Takeaway: Professional workspace doesn’t require a dropped ceiling—painted exposed elements create an industrial-chic vibe
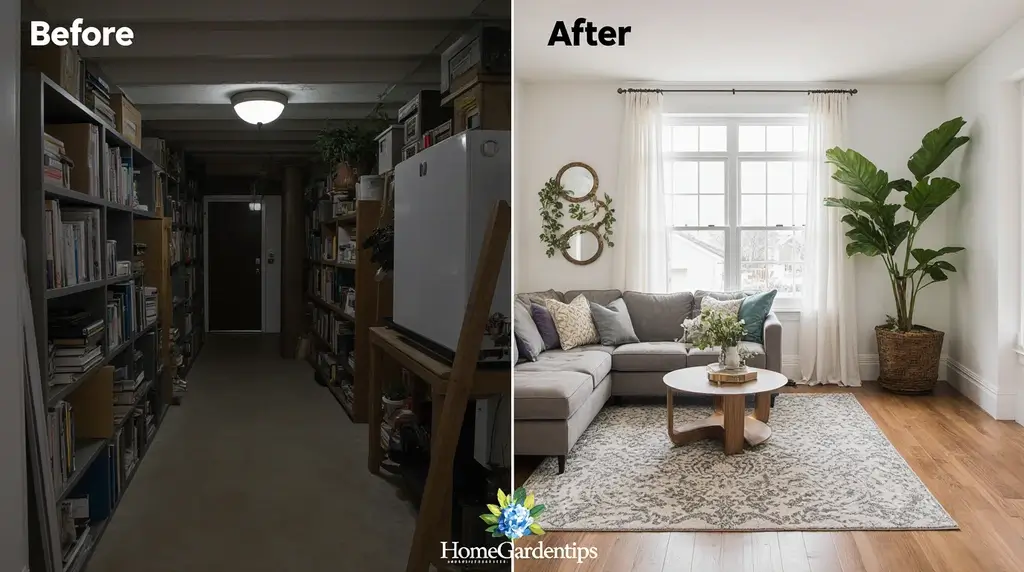
Family Living Room Revival
Before: Outdated faux wood paneling throughout, dark and uninviting with minimal lighting After: Light-filled sanctuary with fresh white walls, spacious sectional sofa, abundant lighting, and modern finishes Key Takeaway: Removing dated paneling and maximizing light transforms atmosphere completely
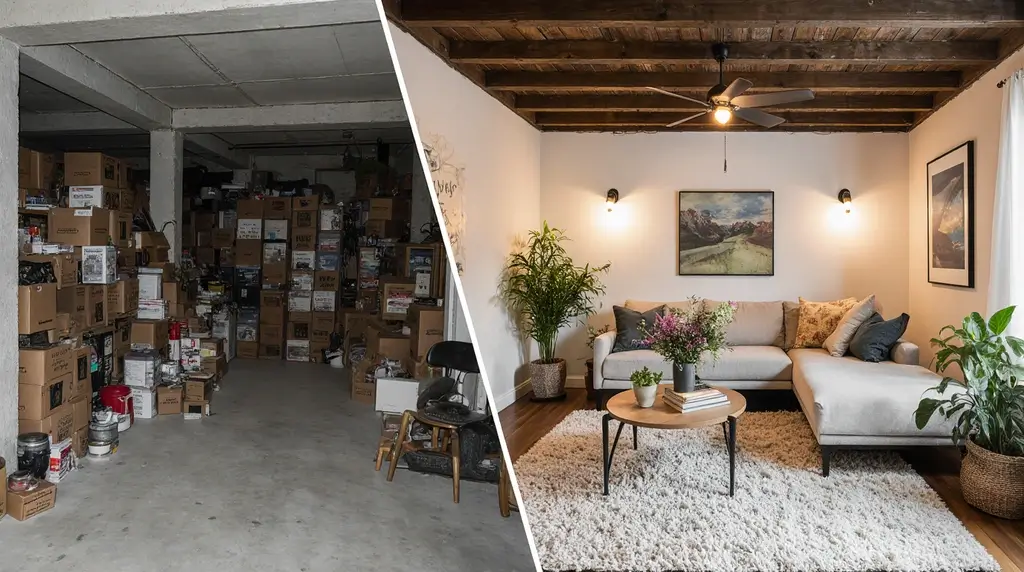
Multi-Zone Entertainment Space
Before: Scary, uninhabitable environment with bare cinderblock walls and damp conditions After: Transformed multi-zone area featuring separate entertainment and work areas (his-and-hers zones), proper moisture control, and defined spaces Key Takeaway: Even severely neglected basements can become functional multi-purpose areas with proper prep work
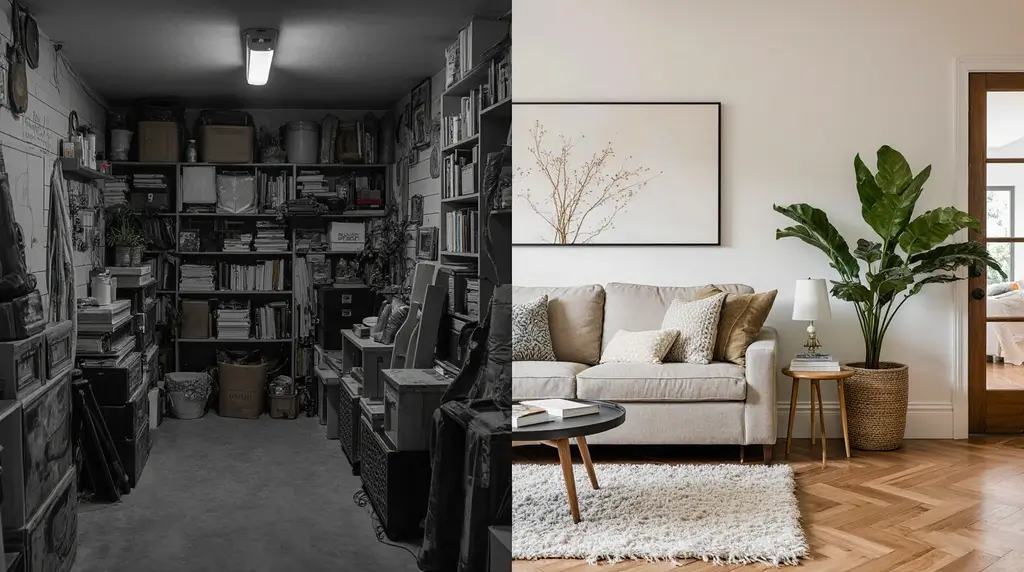
In-Law Suite with Kitchen
Before: Dark, gloomy, rough around the edges with poor lighting and finishes After: Stunning, bright space with full guest bedroom, kitchenette, and separate bathroom—perfect for extended family Key Takeaway: Adding a kitchen and bath creates legitimate living space that adds serious value
Man Cave Makeover
Before: Technically finished but uninspired—just a blank box with carpet and drywall After: Welcoming hangout space using wainscoting-style paneling for warmth, comfortable seating, entertainment center, and personal touches Key Takeaway: Finished doesn’t mean done—thoughtful design details create spaces people actually want to use
Functional Laundry Restoration
Before: Dark, damp, cluttered with severe water damage and outdated fixtures After: Clean canvas with restored vintage laundry sink, new appliances, improved headspace from pipe removal, and proper moisture control Key Takeaway: Sometimes the goal isn’t glamour but functionality—a clean, organized utility space still represents a successful basement makeover
Conclusion: Starting Your Basement Journey
Your basement holds incredible potential—potential living space, potential home value, and potential for enhancing your daily life. Whether you’re planning a major professional remodel with custom features and high-end finishes or a budget-friendly DIY approach using IKEA furniture, carpet squares, and painted concrete, transforming your basement increases both utility and happiness. For more decorating ideas, explore our guide to DIY Indoor Herb Garden for Fresh Cooking.
The key is starting with proper foundation work—addressing moisture, ensuring structural soundness, and planning your layout thoughtfully. From there, even modest investments in flooring, lighting, and paint deliver remarkable results.
Remember: basement makeovers don’t happen overnight. Take your time, tackle one phase at a time, and don’t let the scope overwhelm you. Many successful transformations happen over months or years as budgets allow and skills develop.
Ready to dive deeper? Explore related resources on specific techniques like framing walls for additional storage, installing luxury vinyl plank flooring step-by-step, or restoring vintage concrete laundry sinks. Each skill you master brings you one step closer to unlocking your home’s hidden wing.
Your basement is waiting—let’s transform it together.
What’s the first step before turning a basement into a living area?
Start by checking for moisture issues, leaks, or musty smells—these problems need to be fixed before you do anything else. Once the space is dry and safe, you can plan layouts, lighting, and flooring. It saves a lot of time and money to prep properly.