How to Build a Raised Garden Bed on a Budget 2026
Table of Contents
1. Introduction: Unearthing the Potential of Raised Garden Beds
Look, I get it – building a raised garden bed sounds expensive and complicated. But here’s the thing: it doesn’t have to be! I’ve been down this rabbit hole myself, and trust me, you can create an amazing garden space without selling a kidney. Whether you’re dealing with terrible soil (been there), tiny spaces (also been there), or a back that screams every time you bend over (definitely been there), raised beds are honestly a game-changer.
So what exactly are these magical raised garden beds? Think of them as fancy boxes sitting on top of your ground, filled with the good stuff – quality soil. You can grow veggies, herbs, flowers, whatever makes your heart happy. They can be ankle-high or waist-high, depending on how much you want to baby your back.
Why is everyone suddenly obsessed with them? Because they solve pretty much every gardening headache you can think of. Crappy soil? Not your problem anymore. Tiny yard? No worries. Can’t bend over without groaning like you’re 90? Raise those babies up!
Here’s what I’m gonna walk you through: Everything from “okay, where do I even start?” to “holy cow, look at these tomatoes!” I’ve made all the mistakes so you don’t have to, and I’m sharing all the budget-friendly tricks I’ve learned along the way. Make your DIY projects easier and more fun with our.
2. Why Choose Raised Garden Beds? The Top Benefits for Every Gardener

Your Soil Will Actually Be Worth Something
No More Concrete-Hard Ground: You know how regular garden soil gets stomped down and becomes harder than a rock? Yeah, that won’t happen here. Your plants’ roots can actually spread out and do their thing without having to fight through cement-like dirt.
Fresh Start, Clean Slate: This is probably my favorite part – you get to dump all that terrible soil you’ve been cursing at and start fresh. Got clay that turns into pottery when it dries? Rocky soil that looks like a gravel pit? Doesn’t matter anymore!
Mix It Up However You Want: Want to spoil your tomatoes with extra nutrients? Go for it. Need sandy soil for your herbs? Easy peasy. You’re basically the master chef of soil now.
Growing Conditions That Don’t Suck
Water Actually Goes Where It Should: Instead of pooling on top like it’s having an identity crisis, water will actually soak in and drain properly. No more drowning your poor plants or dealing with swamp conditions.
Warmer Soil = Longer Growing Season: Here’s something cool – raised beds warm up faster in spring and stay warmer longer in fall. It’s like giving your plants a cozy little heated blanket. You’ll be planting earlier and harvesting later than your neighbors!
Water Works Better: The soil actually absorbs water like it’s supposed to, instead of just running off to annoy your neighbors’ lawns.
Your Back Will Thank You (Seriously)
Stop Playing Twister in Your Garden: No more yoga poses just to plant some lettuce. Raised beds bring everything up to a civilized height where humans can actually work without needing a chiropractor afterward.
Organization That Makes Sense: Everything’s neat and tidy in nice rectangles. No more wondering where your garden ends and the weeds begin.
Works Anywhere: Got a tiny balcony? Concrete patio? Doesn’t matter – you can make this work pretty much anywhere.
Pest Control Without the Drama
Fewer Weeds to Battle: You’re starting with clean soil, so there aren’t a million weed seeds just waiting to ruin your day. It’s like getting a head start in a race.
Clear Boundaries: Your garden has actual edges now, so nutrients aren’t just wandering off to feed the neighbor’s dandelions.
Some Animals Will Think Twice: The height alone will deter some critters, and if you use metal, good luck to any climbing troublemakers trying to get in.
Plus, They Look Pretty Great: Let’s be honest – they make your yard look like you actually know what you’re doing, even if you’re totally winging it like the rest of us.
3. Planning Your Dream Raised Garden Bed: Key Considerations
Finding the Perfect Spot
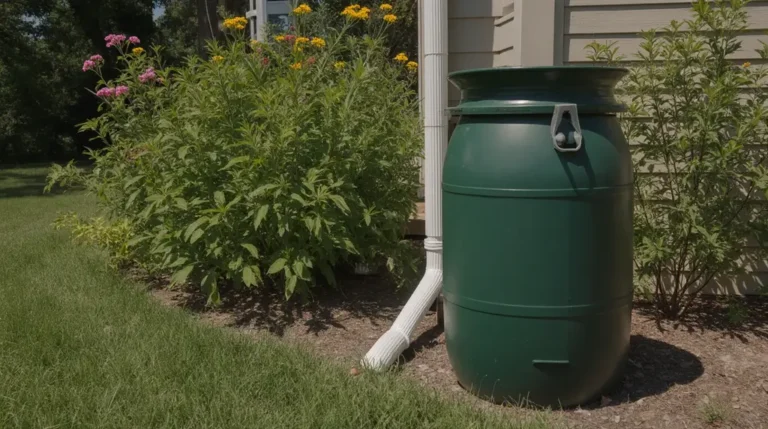
Sun is Everything: Most plants are total sun worshippers and need about 6-8 hours of direct sunlight. South-facing spots are usually your best bet – think of it as prime real estate for plants. you might also like our guide on DIY Rain Barrel System: Collect Water and Cut Your Bills.
Don’t Make Watering a Marathon: Put your bed somewhere you can actually reach with a hose or watering can. Trust me, hauling water across your entire yard gets old real fast.
Keep It Convenient: The closer to your kitchen, the better. You’re way more likely to actually tend to it if you don’t need a hiking permit to get there.
Make It Accessible: You’ll be out there watering, weeding, and harvesting, so make sure you can actually get to all sides without doing gymnastics.
Level-ish Ground is Your Friend: You don’t need a construction site level, but super sloped areas will just frustrate you with runoff issues.
Avoid the Trouble Spots: Stay away from areas that turn into ice rinks or wind tunnels – your plants won’t appreciate the drama.
Figuring Out the Right Size
Width: Don’t Go Crazy: Keep it to 4-5 feet wide max if you can get around the whole thing, or about 2.5 feet if it’s against a wall. You should be able to reach the middle without climbing in and stomping around.
Length: Whatever Works: 8-12 feet is pretty standard and works well with regular lumber sizes. Honestly, a few smaller beds might be easier to manage than one giant one.
Depth Matters:
- 6-8 inches: Works for lettuce, radishes, herbs – the lightweight stuff
- 12-18 inches: This is the sweet spot for most veggies like tomatoes, peppers, carrots
- 18-24 inches: Go this deep if you want to grow bigger stuff or just want to make it super comfy to work with
Picking Your Materials (Without Going Broke)
What to Look For: Food-safe, won’t fall apart in two seasons, and won’t poison your vegetables. Seems reasonable, right?
Wood Options:
- The Good Stuff: Cedar, redwood, cypress – they naturally resist rot and bugs. Cedar’s probably your best bet for the money
- Avoid Like the Plague: Pressure-treated wood (chemicals, yuck) and old railroad ties (also chemicals, also yuck)
- Thickness: Go with 2-inch boards for the main structure – they’ll actually last
- Budget Hack: Look for reclaimed wood, but make sure it’s not treated with anything sketchy
Metal is Pretty Sweet:
- Why It’s Awesome: Lasts forever, thin walls mean more growing space, heats up faster in spring
- Options: Galvanized steel is great, Corten steel looks cool as it weathers, powder-coated comes in fun colors
- The Catch: Can be heavy and more expensive upfront, but it might be worth it long-term
Plastic: The Budget Champion: Cheapest option, lightweight, won’t rot. Just make sure it’s UV-resistant so it doesn’t turn brittle.
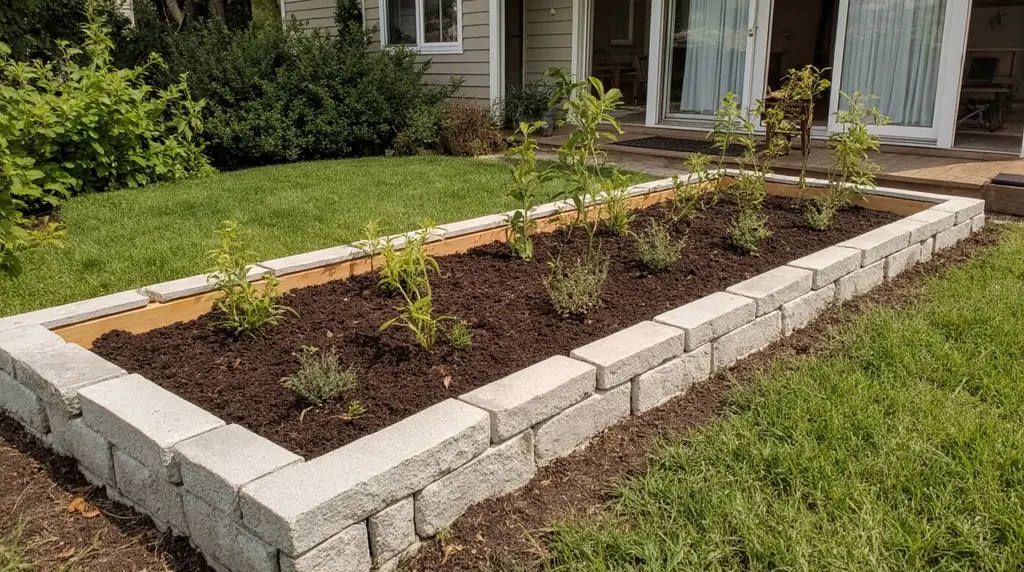
Stone/Brick: Looks amazing, lasts forever, costs a fortune. If you’ve got the budget, go for it.
Get Creative: Old wheelbarrows, large containers, even repurposed furniture can work. Just make sure it’s safe for growing food and has drainage.
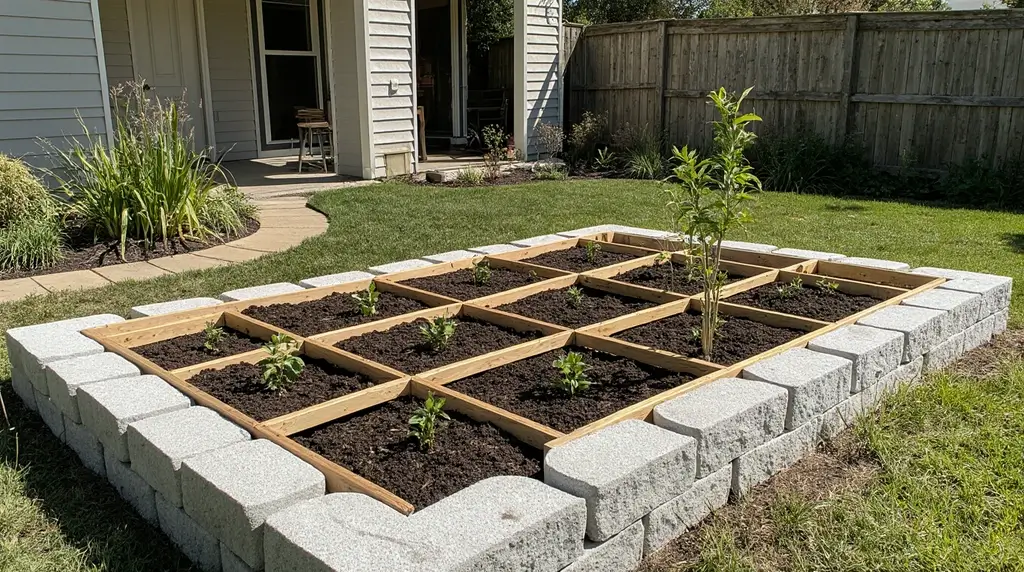
4. Building Your Raised Garden Bed: Step-by-Step Guide
DIY vs. Buying a Kit
DIY Perks: Cheaper, you get exactly what you want, and bragging rights when people ask who built it.
Kit Benefits: Someone else figured out all the measurements, everything fits together, and you probably won’t end up with leftover mysterious hardware.
Let’s Build This Thing
1. Mark Your Territory: Grab some spray paint and mark where your bed’s going. It’s like claiming your gardening kingdom.
2. Prep the Ground:
- Rip out all the grass and weeds (this part’s not fun, but it’s necessary)
- Get it reasonably level – we’re not building a space shuttle here
- You don’t need perfection, just “good enough”
3. Weed Barrier (Optional but Smart): Lay down cardboard, newspaper, or landscape fabric. It’s like putting down a “no weeds allowed” sign.
4. Build Your Box:
- Kits: Follow the instructions (I know, revolutionary concept)
- DIY Wood: Cut your boards, screw them together into a rectangle. Use exterior screws – regular ones will rust and make you sad
- Going Tall? Add some legs to get it to a comfortable height
5. Optional Extras (But Totally Worth It):
- Line the Inside: Landscape fabric keeps soil from sneaking out through cracks
- Add Support: For bigger beds, throw in some cross braces so your walls don’t bow out
- Drainage: If you’re building an elevated bed, add some slats at the bottom with gaps
6. Fun Add-Ons:
- Trellis: Perfect for climbing plants and making your garden look professional
- Storage Shelf: Why not add some storage underneath?
- Safety Edge: If you went with metal, add some rubber edging so you don’t slice yourself
7. Make It Pretty: Stain or paint the outside if you want. Just make sure whatever you use is food-safe on the inside.
5. The Heart of the Bed: Creating Amazing Soil
Math Time (Don’t Panic)
Multiply length × width × height (all in feet) to get cubic feet. Divide by 27 for cubic yards. There – you survived math class again!
The Golden Rule: Fill It with Good Stuff
Don’t try to cheap out by filling the bottom with junk. You want actual soil from top to bottom. Though honestly, a layer of organic stuff like wood chips at the very bottom isn’t a bad idea for drainage.
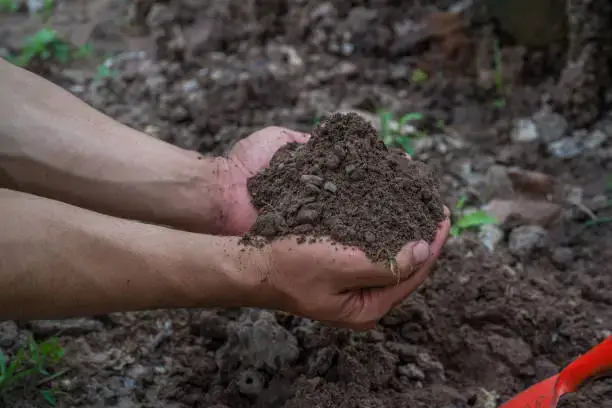
What Goes Into Great Soil
Topsoil: The foundation of everything. Just make sure it doesn’t look like it came from a construction site.
Compost: This is the magic ingredient. It’s basically plant food that keeps on giving. Your vegetables will absolutely love you for this.
Potting Mix: Usually has peat moss and vermiculite to keep things light and fluffy.
Perlite/Vermiculite: Fancy words for stuff that keeps your soil from turning into concrete. Vermiculite holds water better.
Other Good Stuff: Grass clippings, worm castings, leaf mold – basically anything that used to be a plant and is now decomposed.
Budget-Friendly Soil Recipes
The Basic: Half topsoil, half compost. Simple and effective.
The Cheapskate Special: Mostly topsoil (70%) with some compost (30%). Your plants will still be happy.
The Goldilocks Mix: 60% topsoil, 30% compost, 10% potting mix. Just right for most situations.
Veggie Lover’s Blend: Equal parts topsoil, compost, and coconut coir or peat moss. Your tomatoes will think they’ve died and gone to heaven.
Don’t Forget the Plant Food
Plants need the big three (nitrogen, phosphorus, potassium) plus a bunch of other stuff in smaller amounts. Good compost usually covers most of this, which is why it’s so awesome.
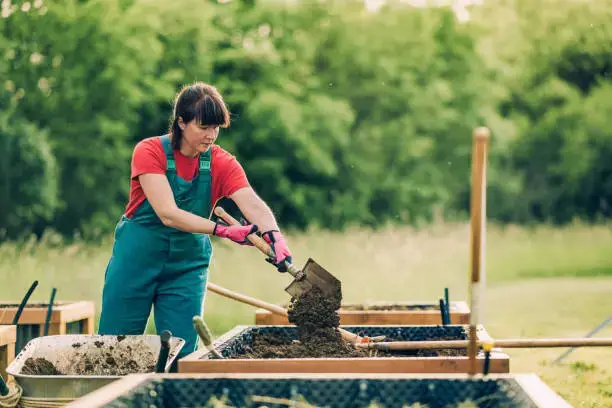
Filling Your Bed
- Throw some chicken wire at the bottom to keep burrowing critters out
- Add your soil mix a few inches at a time, watering each layer
- Leave about 2 inches at the top for mulch and so soil doesn’t overflow when you water
Keeping It Fresh
Add some fresh compost every year, and maybe replace a bunch of the soil every few years. Think of it as giving your garden a spa day.
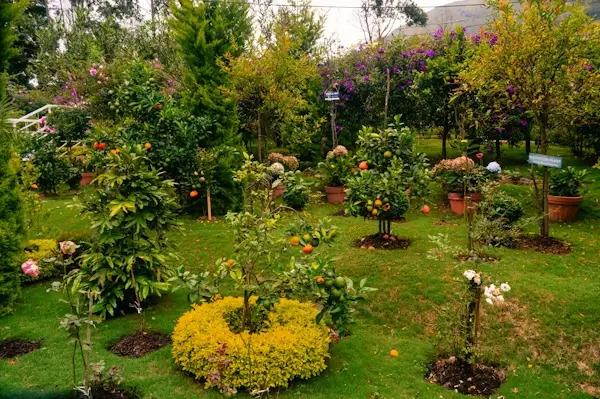
6. Planting for Success: What to Grow and How to Water
The Best Plants for Your New Setup
The cool thing about raised beds is you can pack plants closer together since the soil’s so much better and deeper.
Quick Wins: Lettuce, spinach, Swiss chard – you can harvest these in no time and they keep producing.
Root Vegetables: Carrots, beets, radishes love the loose soil. No more weird-shaped carrots!
Climbing Plants: Peas are perfect – they climb up and even add nitrogen to your soil. Overachievers.
The Brassica Gang: Broccoli, cauliflower, kale – they love the consistent moisture and deep soil.
Natural Pest Control: Onions and garlic scattered throughout help keep bugs away. Plus, you’ll always have cooking ingredients handy.
The Heavy Hitters: Tomatoes, cucumbers, peppers, eggplant – all the good stuff that makes gardening worthwhile.
Herbs Galore: Basil, thyme, cilantro, chives – fresh herbs make everything taste better.
Smart Planting Strategies
Try companion planting – some plants actually help each other out. Basil near tomatoes isn’t just convenient for cooking; it actually helps the tomatoes grow better. Plants are weird and wonderful.
Watering Without Losing Your Mind
The Reality Check: Raised beds dry out faster than regular gardens. Plan on about 1-2 inches of water per week, but use your judgment.
Drip Irrigation is Your Friend: If you can swing it, this is the way to go. Water goes right to the roots, nothing’s wasted, and you don’t have to stand there with a hose.
Hand Watering Tips: Water the soil, not the leaves. Early morning is best – it’s cooler and gives plants time to dry off.
Mulch is Magic: A few inches of straw, bark chips, or shredded leaves will keep moisture in and weeds out. It’s like a blanket for your soil.
7. Keeping Things Running Smoothly
Crop Rotation (Sounds Fancy, Isn’t Hard)
Don’t plant the same stuff in the same spot every year. Mix it up to keep the soil healthy and confuse the bugs. Check out our latest tutorial on How to Build a Fire Pit for Cozy Evenings Outdoors.
Dealing with Garden Crashers
The Usual Suspects: Aphids, slugs, cabbage worms – they’re like uninvited party guests.
Your Arsenal: Encourage ladybugs (they eat the bad guys), use row covers, pick off the big pests by hand, and plant things bugs hate like onions.
Skip the Chemical Warfare: Keep it natural – you’re growing food, after all.
Bigger Troublemakers: Deer need taller fencing, metal beds keep out climbing critters, and hardware cloth at the bottom stops diggers.
Stretching the Season
Since raised beds warm up faster, you can plant earlier and harvest later. It’s like getting bonus gardening time!
When Things Go Wrong
Plants Looking Sad? Yellow leaves or stunted growth usually means they need food. Add some compost or organic fertilizer.
Soil Too Dry? Break up the top layer with a hoe, add fresh compost, and give it a good drink.
8. Getting Creative with Your Beds
Beyond the Basic Box
You can make supported beds with different materials, raised planters on legs for patios, or modular systems that you can expand later.
Fun DIY Ideas
Old bed frames, wheelbarrows, large baskets – basically anything that can hold soil and has drainage can become a planter. Get creative!
Going Vertical
Add trellises or multi-level planters to grow more in less space. It’s like building a plant apartment complex.
Water-Smart Options
Wicking beds have water reservoirs underneath – the plants drink from below. Perfect if you live somewhere hot or travel a lot.
9. Wrapping It All Up
Building a raised garden bed on a budget in 2025 is honestly one of the best gardening decisions you can make. You get better soil, easier maintenance, fewer back problems, and honestly, it just looks pretty darn good.
The upfront cost might make you wince a little, but think about it – you’re investing in years of fresh vegetables, herbs, and the satisfaction of growing your own food. Plus, there’s something really satisfying about building something useful with your own hands.
Your Game Plan
Start simple – maybe just one bed to get the hang of things. Figure out what works in your space and with your budget. You can always expand later once you’ve got the basics down. For more creative ideas, take a look at our post DIY Raised Garden Beds for Maximum Harvest Now.
Don’t stress about getting everything perfect right away. Gardening is basically a long series of experiments, and even the mistakes teach you something.
Connect with other gardeners online or in your neighborhood. We’re a pretty friendly bunch, and most of us love sharing what we’ve learned (sometimes whether you asked or not).
The best part? Once you’ve got your first raised bed setup and see those first vegetables growing, you’re going to be completely hooked. Fair warning – this might become an obsession. But hey, there are worse things to be obsessed with than growing your own food!
So go ahead, pick a sunny spot, grab some materials, and start building. Your future self (and your grocery budget) will thank you.
Is it possible to build a raised garden bed without spending much?
Yes, you can create a sturdy bed with low-cost materials like reclaimed wood, cement blocks, or leftover lumber. Many people even repurpose old furniture frames or pallets. The key is choosing materials that are safe, clean, and durable enough for outdoor use.