Creative DIY Birdhouses to Attract Backyard Birds
Table of Contents
Introduction: Why Give a Bird a Home?
So, you want to build some creative DIY birdhouses? Honestly, it’s one of the most rewarding weekend projects you can tackle. Not only are you helping out your local bird population (who are seriously struggling to find decent nesting spots these days), but you’re also adding some serious charm to your yard. It’s a win-win!
Here’s the thing—with all the development happening everywhere, birds are running out of natural places to nest. That old dead tree with perfect cavities? Probably got cut down years ago. By building thoughtful, well-designed birdhouses, you’re basically becoming a real estate agent for birds. And trust me, they’ll appreciate it.
But beyond just helping nature, these little houses are fun to make! Whether you’re into that rustic farmhouse vibe, quirky whimsical designs, or even sleek modern looks, birdhouses let you get creative while actually serving a purpose. How cool is that? Make your DIY projects easier and more.
Now, becoming a successful “nest box landlord” (yeah, that’s totally a thing) means understanding two main things: how to actually build these properly, and what birds really need to stay safe and happy. Here’s what we’ll cover:
- What makes a birdhouse actually safe and attractive (spoiler: it’s not just about being cute!)
- How to build one step-by-step, including what tools and materials you’ll need
- Fun design ideas to turn basic boxes into awesome “birdtiques”
- Which birds like which houses (they’re pickier than you’d think!)
- Pro tips for keeping your birdhouses in great shape
Ready to become the coolest bird landlord on the block? Let’s dive in!
Section 1: Features of a Safe and Successful Birdhouse (The Functional Blueprint)
Okay, before we get too excited about diy birdhouse ideas and start hot-gluing random stuff together, let’s talk about what actually makes a good birdhouse. Because here’s the deal—birds are way pickier than you’d think. A cute decoration won’t cut it if it doesn’t meet their basic needs.
The Essential Features of a Good Birdhouse
Whether you’re buying one or building from scratch, these features are non-negotiable if you want actual birds to move in:
Drainage and Ventilation: Think about it—would you want to live in a stuffy box with no airflow that floods when it rains? Yeah, birds hate that too. You need ventilation holes near the top (on at least two sides) so it doesn’t turn into a little oven in summer. And drainage holes in the floor are a must so rainwater doesn’t pool inside. Nobody wants soggy baby birds.
Material Choice: Go with rot-resistant wood like cedar, cypress, or redwood for outdoor houses. These woods can handle weather without needing a bunch of chemical treatments that might harm birds. Pine works too if you’re on a budget, just seal it well. But here’s a super important rule: never paint the inside. Keep it natural, raw wood. Birds need that texture to grip onto, plus paint fumes in a tiny enclosed space? Not cool for anyone.
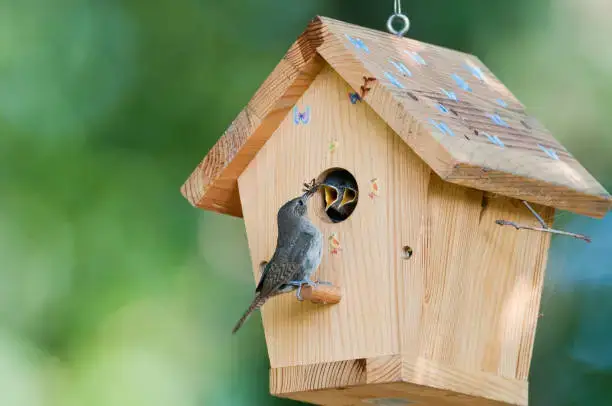
Clean-Out Door: You’ve gotta be able to get in there and clean out old nests between seasons. A hinged side or removable panel makes this easy. Trust me, this isn’t optional—old nesting material can harbor parasites and diseases. Plus, many birds won’t nest in a box that’s already got old stuff in it. Think of it as annual maintenance for your rental property!
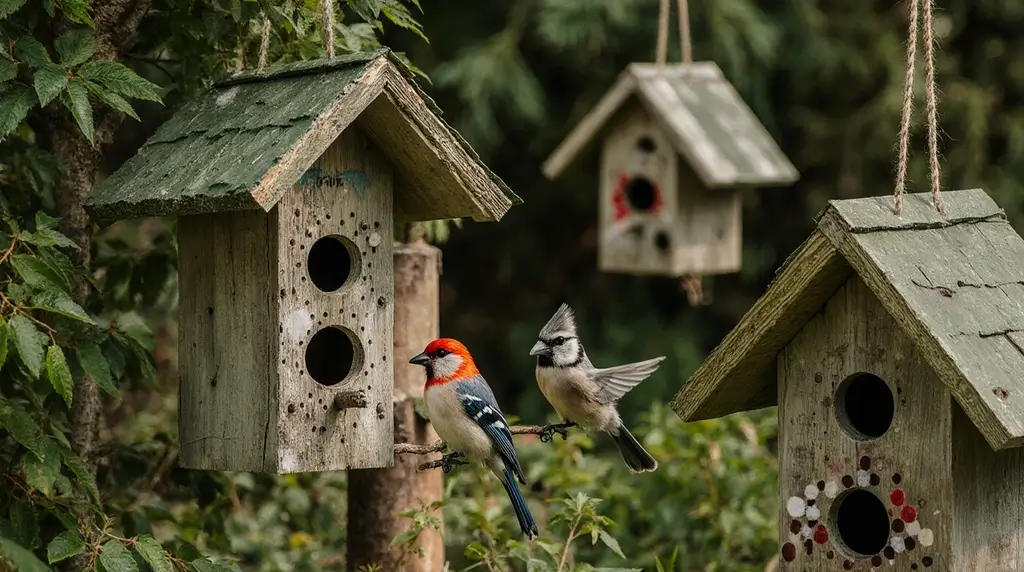
Right Bird, Right House: Matching Species to Nest Boxes
Here’s where a lot of people mess up—they think one birdhouse fits all birds. Nope! Different species are super specific about what they want. It’s like Goldilocks, but with entrance holes and interior dimensions.
A chickadee needs a tiny 1⅛-inch entrance hole, while a flicker wants a massive 2½-inch opening. Bluebirds like their houses mounted about 4-6 feet high in open spaces, but woodpeckers prefer 10-20 feet up near woods. Put up the wrong size in the wrong spot, and you’ll just have an expensive yard decoration with zero tenants.
So before you start working on your birdhouse diy ideas, do a little homework. Figure out which birds actually live in your area. There are cool online tools that’ll tell you who’s likely to nest near you based on where you live. And lots of bird organizations offer free downloadable plans with exact measurements for different species. No guessing needed!
Strategic Nest Box Placement
You could build the most gorgeous birdhouse ever, but if you stick it in the wrong spot, birds will just fly right past it. Location matters—a lot!
Versatile Locations: The good news? Birdhouses can work almost anywhere—your backyard, local parks, farms, cities, even desert areas. The trick is matching where you put it to what your target bird species actually likes in nature.
Mounting Methods: Putting your birdhouse on a sturdy post is probably your best bet. It looks great, stays stable, and helps keep predators away. Mount it at least 5 feet away from tree branches or anything a cat or raccoon could use as a launching pad. And if you’re really worried about climbing predators (and you should be), use a metal post or add a baffle. Basically, make it impossible for anything to climb up there.
Orientation Considerations: Face that entrance hole away from the direction wind usually comes from. Also, in hot climates, you don’t want the afternoon sun blasting directly into the opening all day. A slight forward tilt helps rain run off instead of pooling on the roof. Little details, but they matter!
Section 2: Crafting Your Birdhouse: Detailed DIY Plans and Materials

Alright, now for the fun part—actually building these things! Don’t worry, you don’t need to be a master carpenter. These birdhouse ideas diy are totally doable for regular folks. A similar DIY idea that many readers loved is our post about DIY Vertical Garden Ideas for Small Spaces.
Planning Your Project: Scrap Wood and Specialty Materials
The Scrap Wood Strategy: Before you head to the hardware store, check your workshop or garage for leftover wood. Got some 1×6 pine or cedar scraps lying around? Perfect! Those random cut-offs that are too small for most projects are ideal for birdhouses. You might not need to buy anything at all, and bonus—you’re recycling!
Alternative and Upcycled Materials: This is where you can get really creative and make something totally unique:
- Old Shutters: Grab a vintage wooden shutter, cut it in half vertically, then add some scrap wood for the front and back. The slats already give you ventilation, plus that rustic look is chef’s kiss.
- Vintage Treasures: Old tin dollhouse? Birdhouse. Vintage china plates? Decorative roof. Sometimes the best materials come from thrift stores and grandma’s attic.
- The Knife-Topped Birdhouse: Old silverware arranged as a roof—yeah, it sounds weird, but it looks amazing. Total conversation starter.
- The “Birdtique” Approach: Hit up flea markets for old knobs, candlesticks, drawer pulls, whatever catches your eye. These random bits and pieces can turn a basic box into something that belongs in a garden magazine.
Essential Tools for the Build
You don’t need a fancy workshop, but having the right tools makes everything easier and your results look way more professional:
- Miter Saw or Table Saw: For nice, clean, accurate cuts
- Bandsaw or Jigsaw: Great for curves and creative shapes
- Drill or Drill Press: You’ll need this for the entrance hole and assembly
- Forstner Bit or Hole Saw: Makes perfect circular entrance holes in whatever size you need
- Countersink Bit: So your screw heads sit flush and look nice
- Narrow Crown Stapler: Speeds things up if you’ve got one
Step-by-Step Construction Guide (The Bird House Hotel Example)
Let’s walk through building a classic birdhouse that’ll actually work:
1. Cutting Components: Set up a stop block on your miter saw so all your pieces come out exactly the same size. For angled roofs, cut at 45 degrees for that nice peak. And seriously—measure twice, cut once. I know it’s cliché, but you’ll be mad at yourself later if you don’t.
2. Creating the Entrance Hole: Mark where you want the hole (usually about 6-7 inches from the bottom of the front panel). Use a 2-inch Forstner bit—or whatever size your bird species needs. Drill slowly and put scrap wood underneath so it doesn’t splinter on the back side. Clean holes = happy birds (and a house that looks professional).
3. Pre-Assembly Painting and Sealing: Here’s a pro tip—paint everything BEFORE you assemble it. Trust me on this. Do three coats of exterior paint or stain on all your pieces, letting them dry completely between coats. This way every edge and corner gets protected. Use exterior-grade stuff, but remember: inside surfaces stay natural. No paint inside!
4. Assembly: Pre-drill your screw holes with a countersink bit so the screw heads sit below the surface. Dab some construction adhesive on the joints before screwing things together—it’s like insurance against weather. Put the sides, front, and back together first, then add the floor (with those drainage holes already drilled), and finally the roof.
5. Building the Base or Mounting Sleeve: If you’re mounting this on a post, make a sleeve from a 4×4 cedar post. Leave about ⅛-inch clearance on a couple sides so the birdhouse fits on loosely. Wood expands and contracts with moisture, so that wiggle room is actually important.
6. Finishing Touches: Fill those screw holes with construction adhesive, let it dry, sand smooth, then hit it with one more coat of paint. Run a bead of clear caulk where the house meets the mounting sleeve to keep water from sneaking in from below. And you’re done!
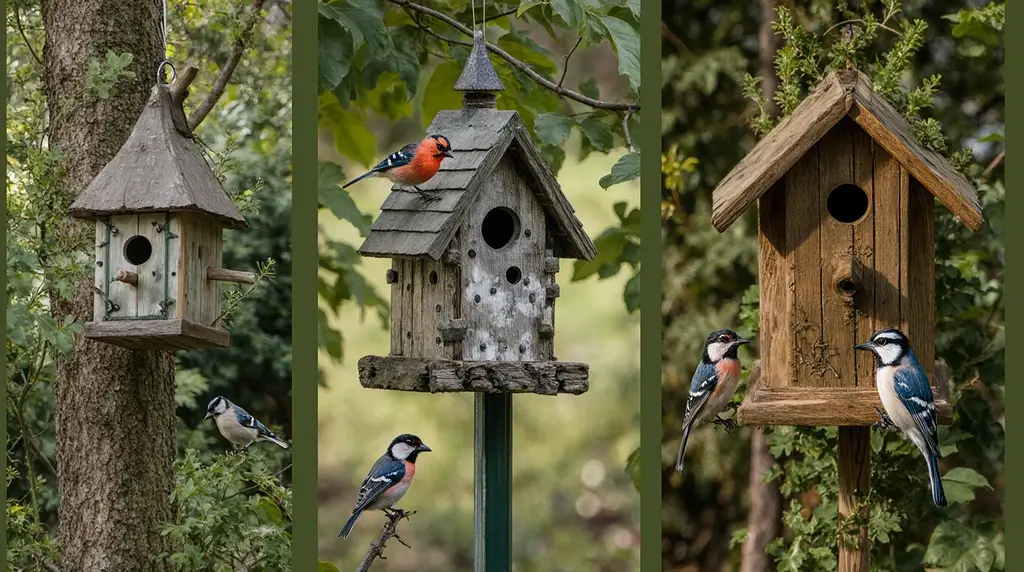
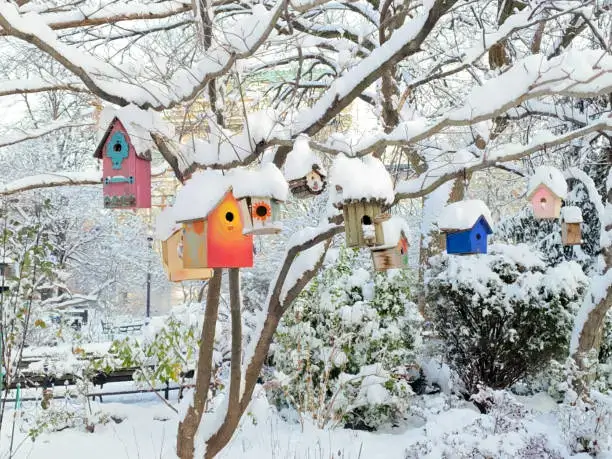
Section 3: Generative Design: Creating Unique “Birdtiques” and Creative Accents

Okay, now we’re talking! Once you’ve got the basics down, it’s time to make your birdhouses actually interesting. Let’s turn those functional boxes into little works of art.
Customizing the Four Elements of Design
You’ve basically got four things you can play with to create unique looks:
Bases: This is your foundation, and it sets the whole vibe. Old coat hooks make cool mounting brackets, discarded candleholders become elegant pedestals, and vintage light fixture parts add that architectural flair. Get creative—your birdhouse doesn’t have to sit on a boring square base!
Roofs: Why stick with standard wood shingles when there’s so much more out there? Thin sheet metal can be shaped and aged for an industrial vibe. Rubber belting is durable and has cool texture. Or get wild and stretch outdoor fabric (like Sunbrella) over a wood frame, seal it up, then glue on some preserved moss for a living roof. Nature meets design!
Perches: Okay, real talk here—you should actually remove perches from store-bought birdhouses. I know they look cute, but they just give predators a convenient foothold to reach in and grab eggs or baby birds. Not cool. If you want the look of a perch without the danger, mount decorative stuff on the SIDE as a handle—like cabinet knobs, old spigot handles, or dainty wooden buttons. They’re too delicate to help a squirrel but perfect for you to grab when you need to clean the house out.
Predator Guards: Protection can look good too! Adding about an inch of material around the entrance hole stops raccoons and squirrels from reaching their nasty little paws inside. Old porcelain light sockets, rubber gaskets, or stacked metal washers all work great and add visual interest. If you’re housing bluebirds, add extra protection—they’re vulnerable to crows, cats, and snakes.
Creative Finishing Techniques
This is where your birdhouse goes from “nice” to “wait, where did you GET that?”
Aged Appearance: Want that instant vintage look? Learn to patina copper flashing for your roof. You can speed up the process with vinegar and salt solutions, or just let nature do its thing. That blue-green aged copper look makes your brand-new birdhouse look like a treasured family heirloom.
The Rustic Look: Don’t sand everything smooth! Leave pallet wood rough and weathered for the roof. Then contrast that worn wood with bright, bold paint colors—think cherry red or cobalt blue. Throw on a random glass doorknob as a side decoration, and boom—rustic perfection.
The Whimsical Look: Grab some thin sticks from your yard for birdhouse “legs.” You can leave the bark on for texture or whittle it off for a smoother look. Use bendable metal (roof flashing works great) to cut out wings and score some “feathers” into them. Now you’ve got a birdhouse that literally looks like a bird. Meta, right?
Decorative Accents: Paint bird silhouettes on the sides, arrange pinecones like shingles on the roof, or try simple techniques like dip-dot painting to create flower garden designs. You don’t need to be Michelangelo—even basic decorating adds personality.
Section 4: Advanced Nest Box Management and Troubleshooting
So you’ve built your creative DIY birdhouses and they look amazing. But the work doesn’t stop there! If you want birds coming back year after year, you’ve gotta know how to manage these things.
Dealing with Threats and Competitors
Invasive Species Management: House sparrows and European starlings (both non-native) can be real jerks. They’ll destroy native bird eggs, kill baby birds, or build nests right on top of active nests. Learn to ID these troublemakers so you can manage them legally and protect your native birds.
Predator Strategies: Different predators need different solutions. Snakes? Special baffles or slippery coating on posts. Flying squirrels? Cute, but they’ll evict birds or eat eggs. Cats? Still one of the biggest threats—proper mounting height and guards are essential. And raccoons have freakishly long reach, so deep boxes or extended entrance holes can be lifesavers.
Integrating Technology (Nest Box Cameras)
Nest box cameras are super cool if you want to watch what’s happening without bothering the birds. Before you install one though, think about power, weatherproofing, and whether it might stress the birds or attract unwanted attention from predators. Position it so you can see inside but not block the entrance or mess with ventilation.
General Troubleshooting
Empty boxes? Could be wrong hole size or bad placement. Abandoned nests? Maybe parasites, predators, or someone kept disturbing them. Here are common issues:
- Birds check out your box but don’t move in
- Dealing with aggressive competitors
- When to clean out unsuccessful nests
- Handling wasps or ants (ugh)
- Moisture problems even with drainage
There are comprehensive troubleshooting guides out there that cover all this stuff in detail!
Conclusion: Continuing Your Landlord Journey
Look, building beautiful, functional birdhouses is honestly one of the most satisfying hobbies you can pick up. You’re combining woodworking skills, ecological know-how, and artistic expression all in one project. And when you see that first bird family move in? Chef’s kiss. Check out our latest tutorial on Creative Pallet Projects for Home and Garden Décor.
The best nest box landlords don’t just build once and forget about it. Each season teaches you something new—maybe you need to adjust placement, tweak designs based on who’s actually using them, or expand your collection to attract different species.
Ready to get started? Grab some free, species-specific plans from bird organizations to make sure your measurements are spot-on. Sign up for birding newsletters to keep getting new ideas and seasonal tips. And hey, consider joining programs like NestWatch where you can share what you’re seeing and help actual scientists track nesting patterns across the country.
Your backyard birds are out there right now looking for the perfect place to raise their families. With these creative DIY birdhouses, you’re about to give them exactly what they need—with some serious style points thrown in.
Now grab your tools, let your creativity loose, and get building! Your future feathered tenants are gonna love what you come up with.
Happy building! 🔨🐦
What’s the easiest type of DIY birdhouse for beginners to start with?
A simple wooden box-style birdhouse is usually the easiest project. It only needs a few cuts, basic tools, and simple assembly. You can customize it later with paint or decorations once you get the hang of the basics.